
‘Tis the season to draw some Christmas trees! In this Inkscape tutorial, we’ll be using some simple shapes to draw a clip art style Christmas tree. Let’s get started!
The Final Result

1. Create The Greens
Step 1
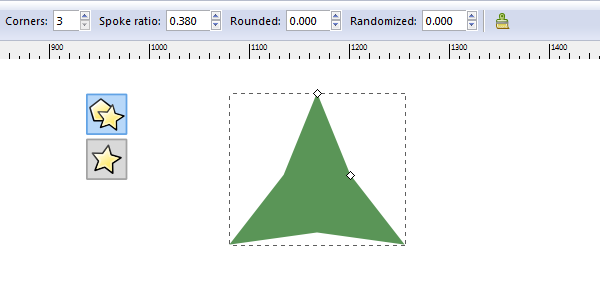
To start, let’s grab the Polygon tool and select the Star shape. Now, change your settings to match mine below and hold Control while you drag to create this triangle shape. Give this a nice green color, of course.
Step 2
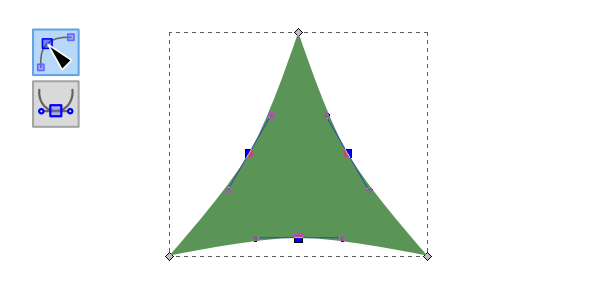
With the triangle still selected, head up to Path > Object to Path to create some nodes. Grab the Nodes tool and select the middle nodes on all sides, then click Make nodes symmetric.
Step 3
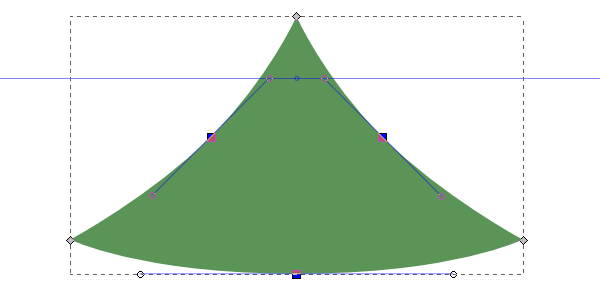
This will curve the paths and allow you to adjust them to look something like mine below. I dragged a Guide down from the top ruler to keep my handles even.
Step 4
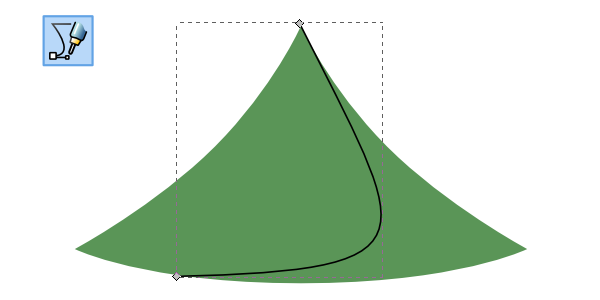
Now we need to create a shadow. To get started, duplicate (Control+D) the triangle shape. Next, get that Pen tool out and draw a simple curved line over this new triangle. Select both the triangle and the line, then head up to Path > Division to make the cut.
Step 5
You’ll end up with two shapes - grab the shadow shape and discard the rest. Then, position the shadow shape over the original triangle (using Object > Align and Distribute will make this much easier). Give the shadow shape just a slightly darker green color.

2. Assemble the Tree
Step 1
Now that we’ve got our tree part, we can simply duplicate a few of these, resize, and position accordingly.

Step 2
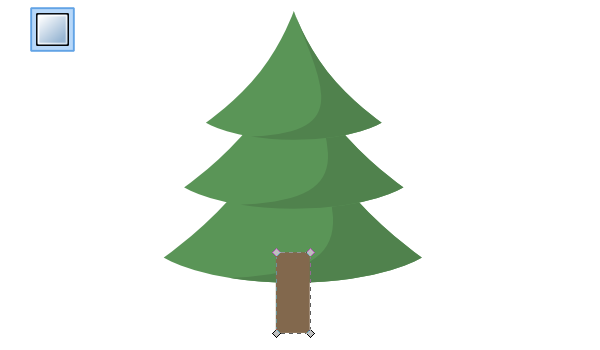
Next up, grab the Rectangle tool and draw a simple brown, tree trunk shape. Let’s also Path > Object to Path this square.
Step 3
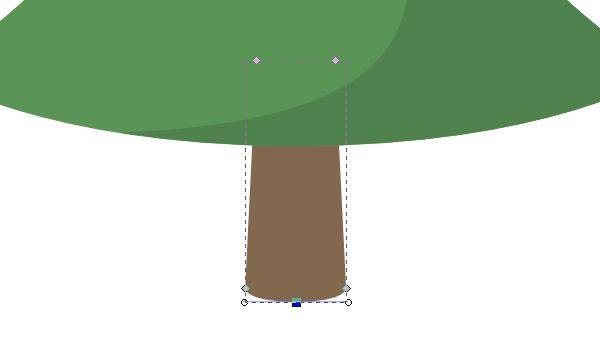
With the Nodes tool, adjust the shape to look a little more trunk-like.
Step 4
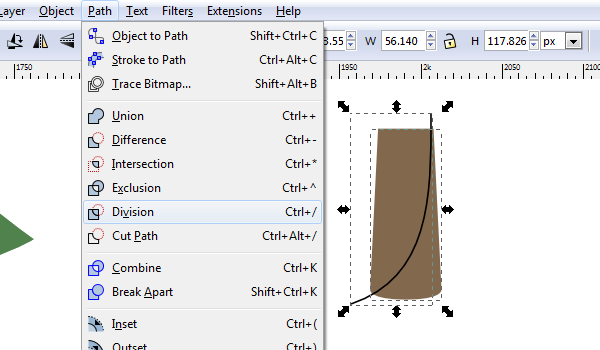
Of course, we need a shadow for the tree trunk also. We’ll be doing the same method as before, so go ahead and draw a line over a duplicated tree trunk and Divide.
Step 5
Position the shadow shape over the original tree trunk with Align and Distribute and darken the brown.

3. Pot the Tree
Step 1
So to start drawing the pot, draw a couple ovals over each other with the Ellipse tool. Once again, let’s run Object to Path on both of these.

Step 2
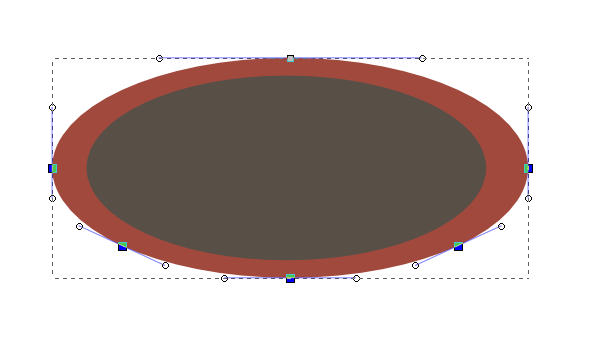
To create a pot shape, select the Nodes tool, select the side and bottom nodes, and then Add nodes.
Step 3
Grab the bottom nodes and drag them down to create the pot.
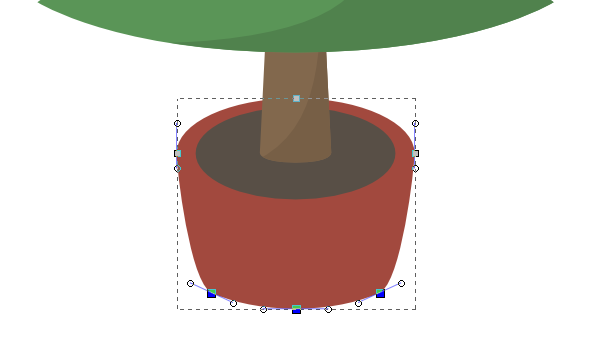
Step 4
You guessed it… another shadow!
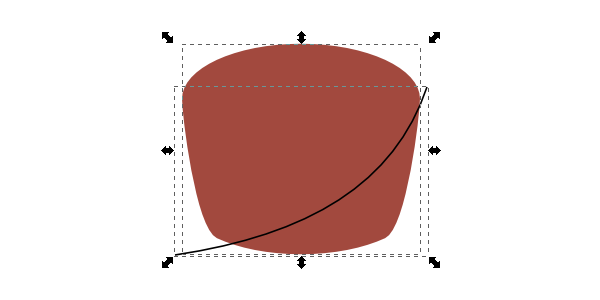
Step 5
Now just position the shadow on the pot.

4. Ornaments!
Step 1
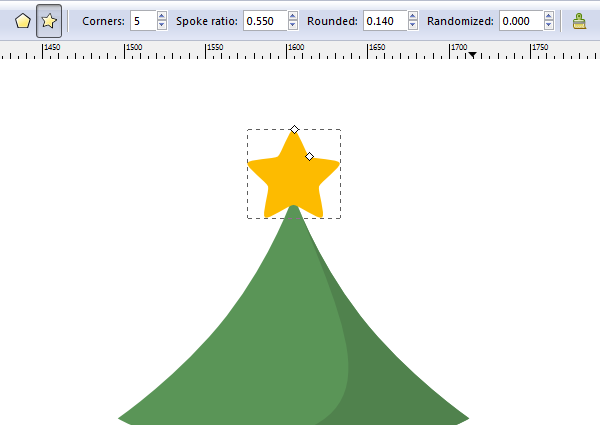
Well, let’s just start with a star on the top. Grab the Polygon tool again and set your settings to mine below, then simply draw a bright yellow star.
Step 2
Now it’s time to draw those simple round ornaments. Start with a red circle and a white oval for a reflection.

Step 3
And for the final time, let’s give this ornament a shadow.

Step 4
To polish it off, add another circle behind the ornament that has the same tree shadow green.

Step 5
Now just duplicate a bunch of these and place them anywhere you want!

Step 6
All that’s left to do is add some sort of cool snowflake background to finish the scene. Looks great!
‘Tis the End!
This tutorial is part of 5 Easy Holiday Drawing Tutorials Using Inkscape
That finishes up our Christmas tree drawing tutorial in Inkscape. Our end result is a nice, simple looking Christmas tree with a clip art style to it. I hope you had fun with this one!