Inkscape has added a new QR code generator that makes it easier than ever to add them to your design projects. Let’s go over how to make a QR code entirely in vector using Inkscape.
1. Generate QR Code
Step 1
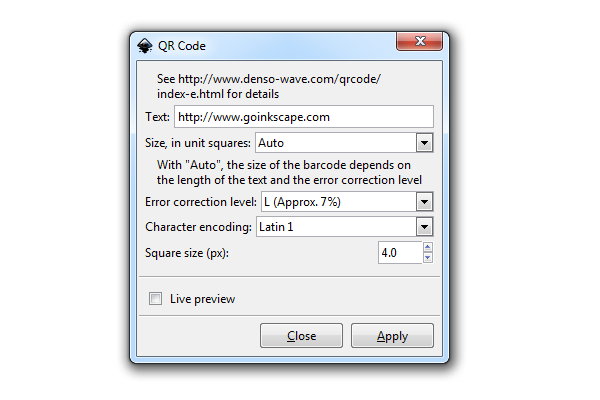
To open the QR code generator, head up to Extensions > Render > Barcode > QR Code. Simply enter the text to encode and click Apply to create a custom QR code.
Step 2
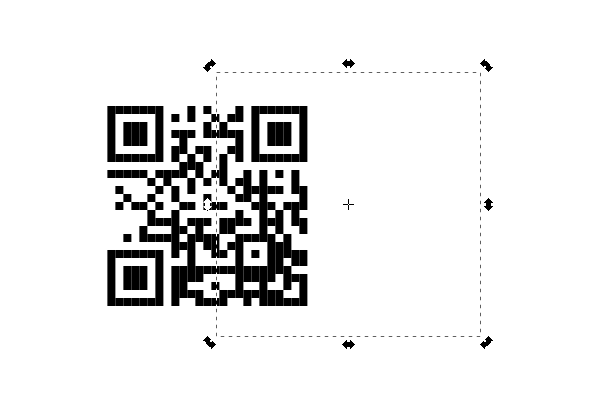
The first thing I did was Ungroup the QR code and remove this white square behind it (I’m not too sure why that’s there, either). Notice those tiny vertical white lines in between all of the squares? That’s because the position of the QR code doesn’t perfectly line up with the pixels.
Step 3
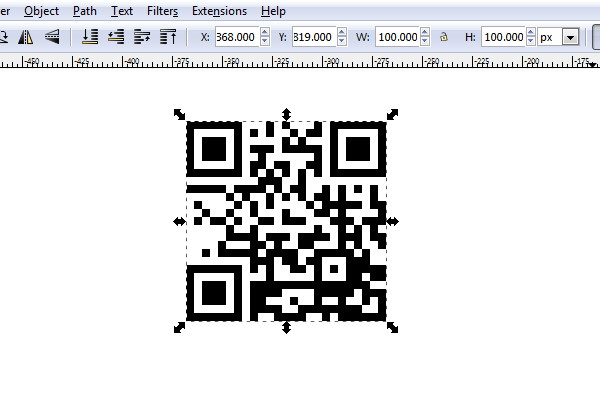
To fix this, simply select your QR code and make sure the X and Y coordinates have no decimal points. Also, double check that the Width and Height don’t have any decimals either. That finished up the QR code, but I wanted to see what else we can do with it.
2. QR Code with Rounded Boxes
Step 1
For this next step, select all of the QR code squares and do Path > Object to Path, Path > Combine, and Path > Dynamic Offset. You’ll notice below that I only have a single node in the top left corner of my QR code, which is the Dynamic Offset. You can slowly drag this to adjust the overall offset of the QR code.

Step 2
The goal here is to thin it down as much as possible (without deleting anything, of course). This is a resource intensive process and will most likely respond slowly, so a little patience will be required here.
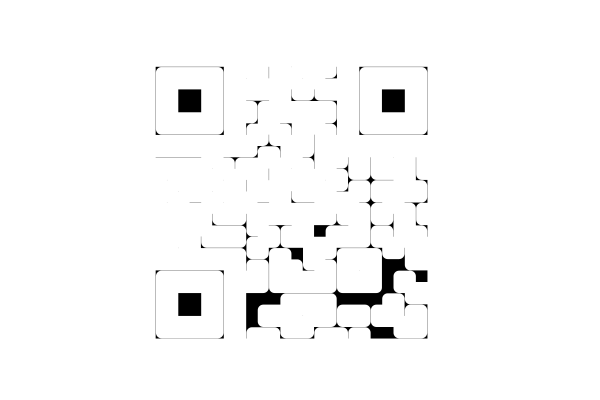
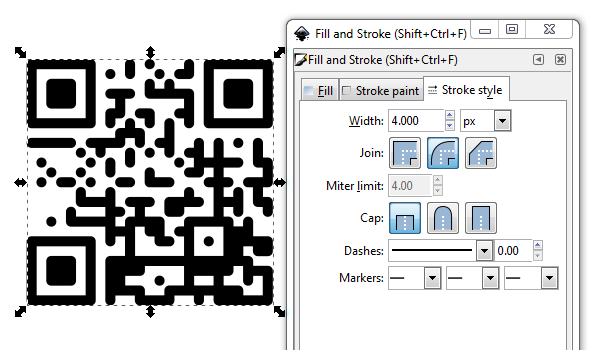
Step 3
Since it’s so incredibly thin now, we can add a thick Stroke with a Rounded Join to make everything rounded.
Step 4
Then I got a little carried away with duplicating and coloring, but believe it or not, this still scanned just fine for me! How cool is that?

That’s It!
So that’s how you create a QR code in Inkscape. It’s a great feature that has endless possibilities, so I’m certain you guys will have fun creating cool QR codes (I know I will). You can also create different types of barcodes in Inkscape. Thanks for reading!