One of the most sought after features in Inkscape is gradient meshes. Unfortunately, Inkscape doesn’t have a gradient mesh tool as of right now, but there is a workaround. Let’s go over a really neat trick to fake gradient meshes in Inkscape!
Step 1
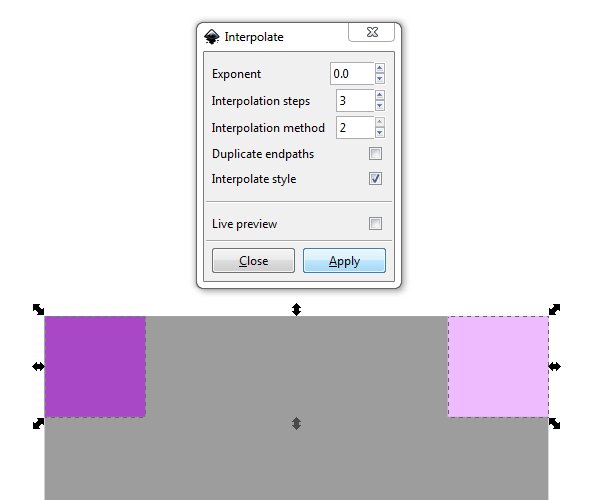
We’ll be doing a simple square with a four color gradient mesh. Below, you’ll see I have a 500px square along with the four 100px color squares arranged inside.

Step 2
To start the gradient mesh trick, select the two top squares, then head up to Extensions > Generate from Path > Interpolate to bring up the menu. Since my main square is 500px and my colored squares are 100px, I only need to interpolate 3 steps. I also unchecked Duplicate endpaths and checked Interpolate style.
Step 3
After you click Apply, you should end up with a nice, even spread of appropriately colored squares.

Step 4
Then just simply repeat this for all four directions.

Step 5
And then I ungrouped the interpolated sections and interpolated the rest individually (vertically). I’m not sure if there’s an easier way to do this all at once.

Step 6
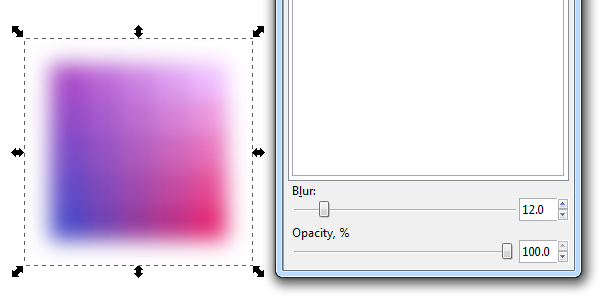
To actually create the gradient, go ahead and group all of the interpolated squares, then add some Blur until it looks smooth and natural.
Step 7
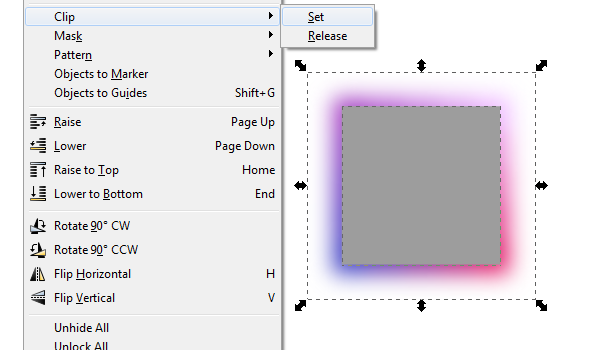
Now, grab the original square and position it over the gradient. Select them both and head up to Object > Clip > Set to set the gradient.
Step 8
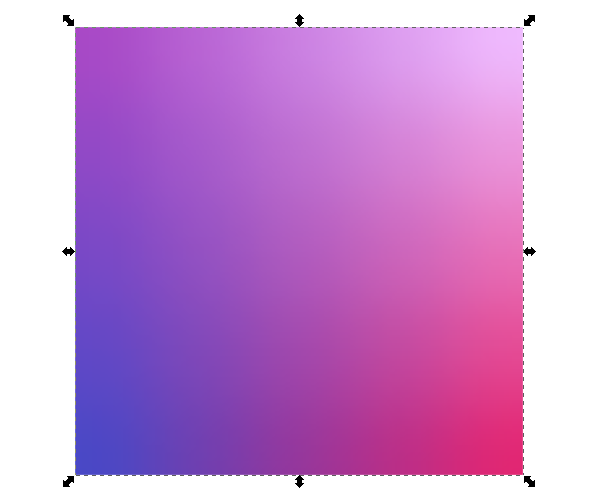
Below is my final gradient mesh square. Looks good, huh?
That’s It!
This is an awesome little hack to create a fake gradient mesh in Inkscape. You can keep elaborating and interpolating to create even more advanced gradient meshes for advanced shapes. For more information on this, check out a file located in your Inkscape folder (Inkscape > share > examples > gradient-mesh-experimental.svgz) which happens to be the inspiration for this tutorial. Let me know what you think! Thanks for reading.